Updated on: 17 Jan 2025
By: Admin
Data Management allow user to upload the updated data collecting, organizing, and maintaining data to ensure its accuracy, security, and accessibility for decision-making and operations.
How do I upload new raw data to the portal?
To upload new raw data:
1. Navigate to the Data Management section in the dashboard.
2. Click on the "Upload Data" button.
3. Select the required fields (e.g., "TimePeriod", "Category", "Segment", and "Touchpoint").
4. Select the data file (ensure it is in the cleaned raw data format).
5. Click "Upload File" to upload the data.
Note: Ensure all mandatory fields are completed before uploading.

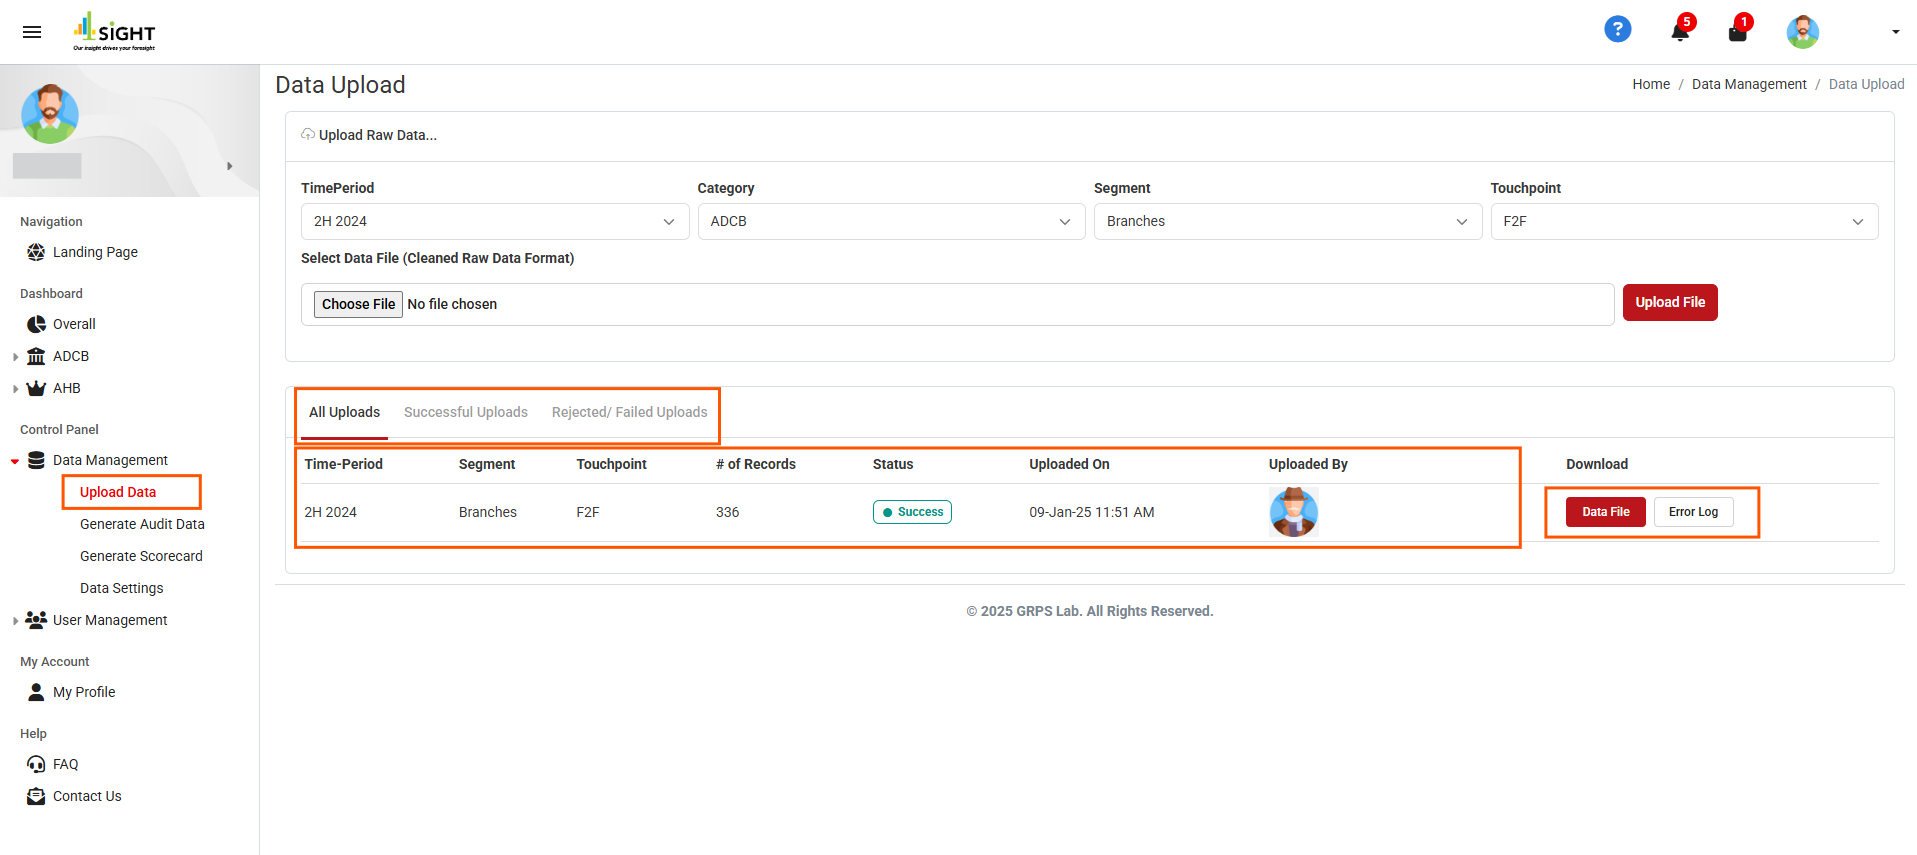
How do I navigate all the existing uploads?
To view existing uploads:
1. Go to the Data Management section.
2. Click on the "Upload Data" button.
3. The Data Upload page consists of the following sections:
- All Uploads: Displays all records of data uploads with relevant details.
- Successful Uploads: Shows records of successfully uploaded data.
- Rejected/Failed Uploads: Lists rejected/failed uploads with relevant details.
Note: Download the data file or error log by clicking "Data File" or "Error Log", respectively.
How do I generate Audit level data from the portal?
To generate Audit level data:
1. Navigate to the Data Management section in the dashboard.
2. Click on the "Generate Audit Data" button.
3. Select the required fields (e.g., "TimePeriod", "Category", "Segment", and "Touchpoint").
4. Click "Generate" to create and download the audit data.
Note: Ensure all mandatory fields are filled in carefully before generating.

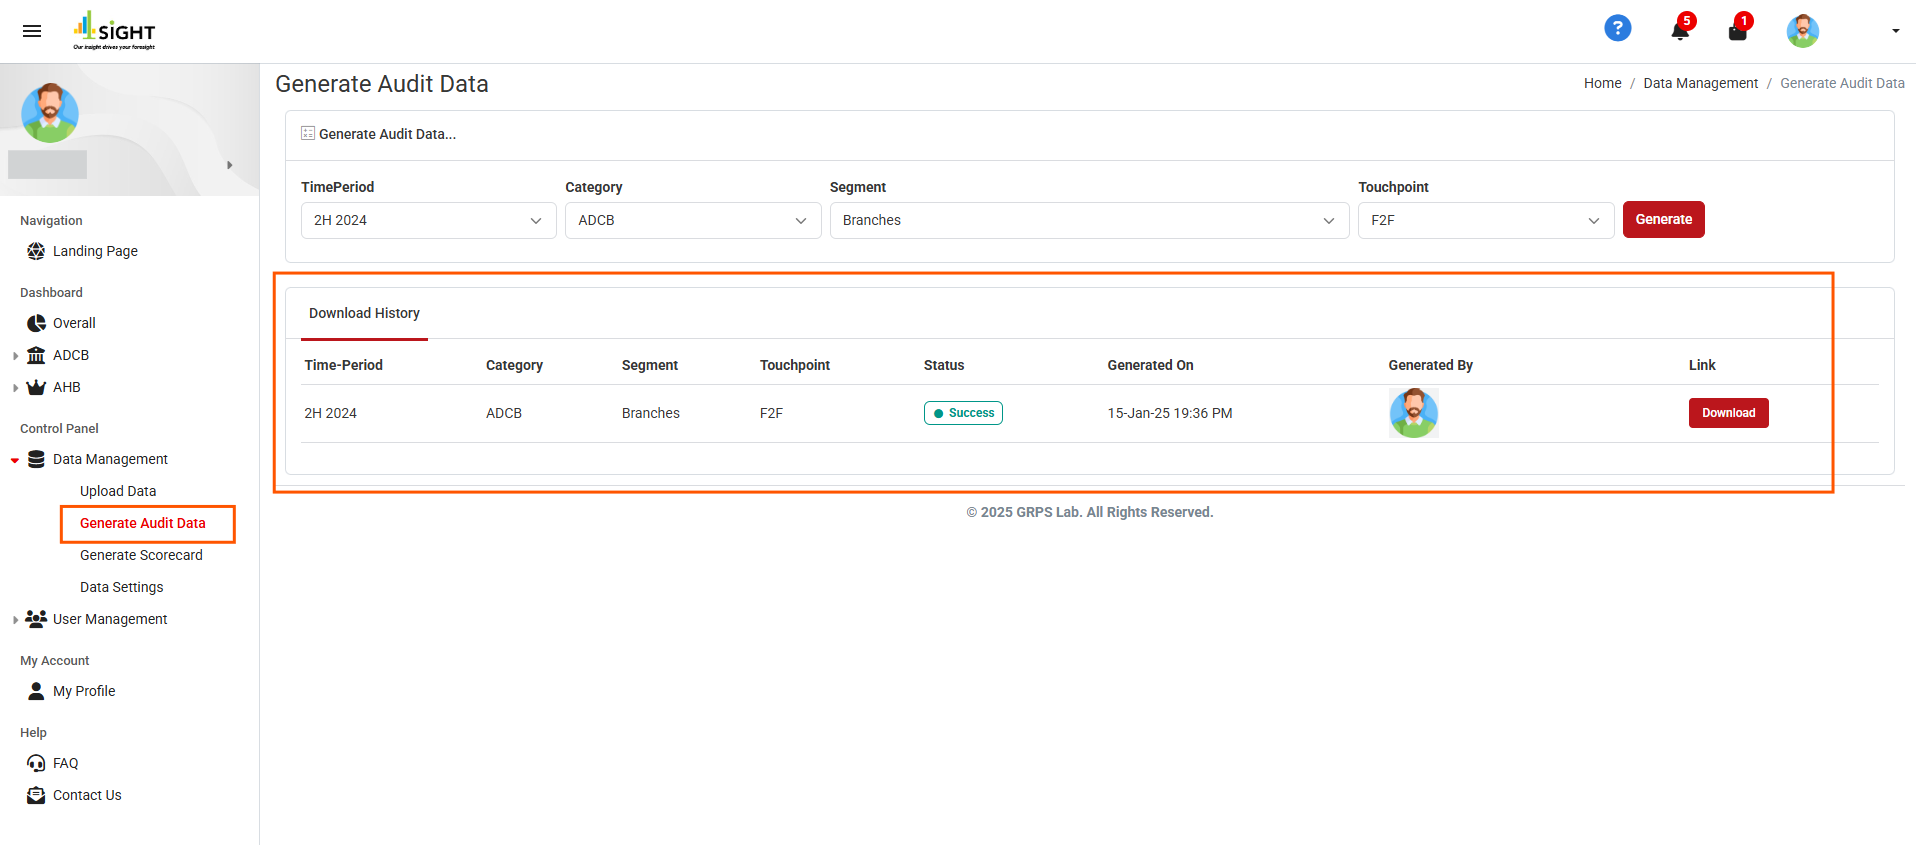
How do I navigate all the existing Audit level data?
To view existing Audit level data:
1. Navigate to the Data Management section in the dashboard.
2. Click on the "Generate Audit Data" button.
3. The "Download History" section contains records of all existing audit data with relevant information.
Note: Download the audit data by clicking the "Download" button.
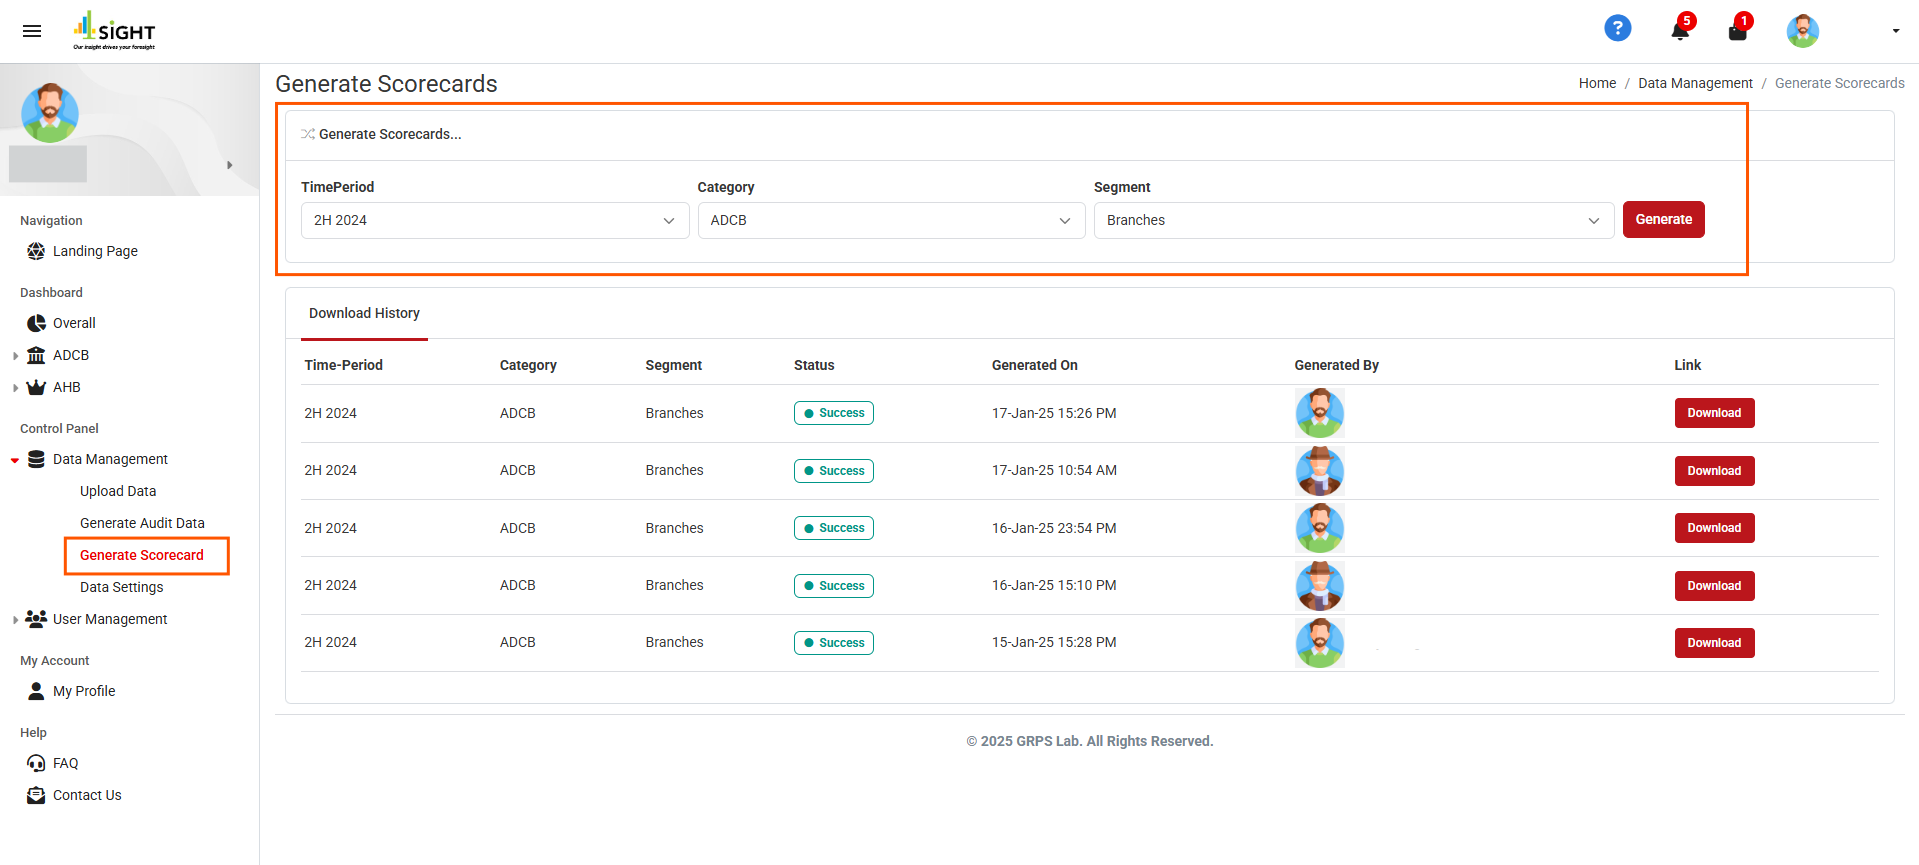
How do I generate a scorecard from the portal?
To generate a scorecard:
1. Navigate to the Data Management section in the dashboard.
2. Click on the "Generate Scorecard" button.
3. Select the required fields (e.g., "TimePeriod", "Category", and "Segment").
4. Click "Generate" to create and download the scorecard.
Note: Ensure all mandatory fields are filled in carefully before generating.
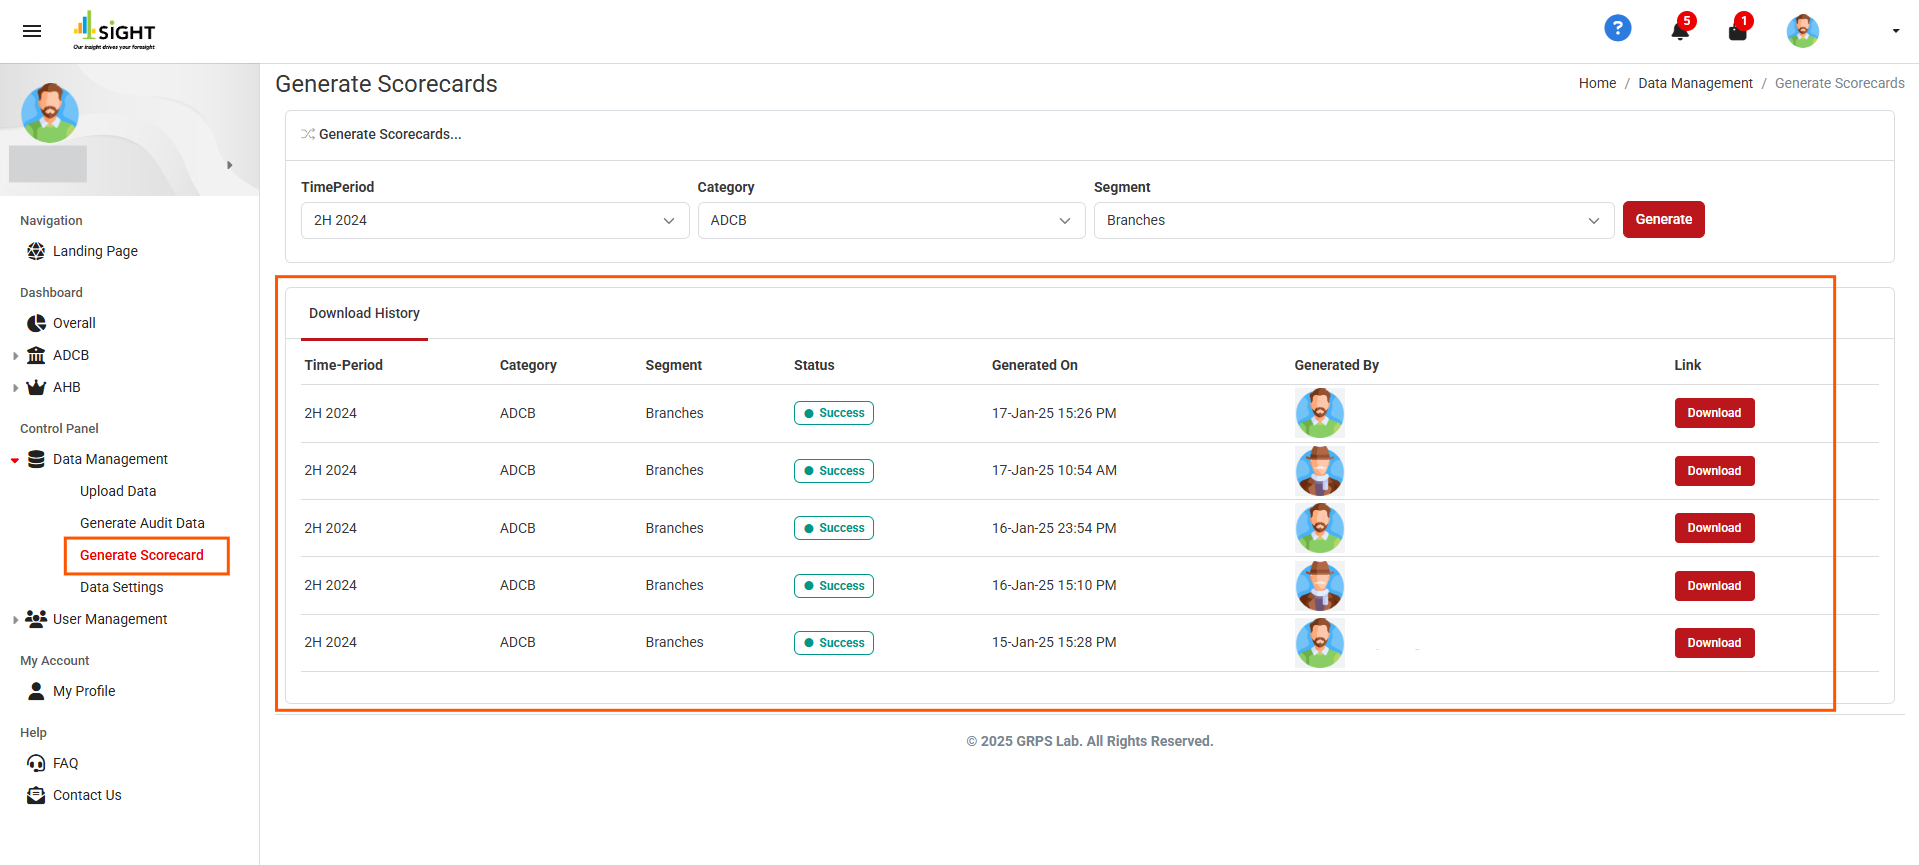
How do I navigate all the existing scorecards?
To view existing scorecards:
1. Navigate to the Data Management section in the dashboard.
2. Click on the "Generate Scorecard" button.
3. The "Download History" section contains records of all existing scorecards with relevant information.
Note: Download the scorecard by clicking the "Download" button.